
Seattle Colleges’ series of engaging and informative sessions designed to enhance knowledge and skills in creating accessible content.
Author Archives: kejohns72
Advanced Acrobat: Creating an Accessible PDF from an Image File
Learn how to create an accessible PDF from a scanned image file with no readable text on the page. Note: this tutorial assumes you have full rights and permission to the document and its contents.
Select here for transcript.
[Music]
Hello. Today we’re going to create a PDF that is accessible, but start with a scanned document.
This means that we are going to start with a document that you’ve either scanned in a copy machine or maybe took a screenshot of. It means that the image is flat and there are no words that are readable on the document.
So, the first thing we want to do is create the PDF, and we can create the PDF from a variety of formats including PNGs.
So, that’s what we’re going to do today. I’m going to create PDF. Select my file and choose the PNG file that I want to use. Then I’m going to choose create. So, this document looks like it has text on it.
But in the computer’s perspective, this is simply an image.
And you can tell that because I have no text to recognize.
So, the first thing we have to do before we do anything else is get it to recognize text, because as of right now, you’ll notice that there are no tags in this document. There cannot be tags until the text is recognizable.
So, we’re going to first have it document or go through this document and make this, uh, readable. You can do this in a couple ways. When you select the image. You can tell it to recognize text, which it will go through this image now and recognize the text. Or, you can come over here to your toolbar and find the scan and OCR. OCR stands for Optical Character Reader. When you click on this, you’re going to choose the recognized text in this file.
When we click that, we’re going to confirm that the language in this case is English and Recognize Text. It’s going to take just a few moments because this document is just one page and is pretty readable in regards to how the font does not have any, um, you know, marks on the page or anything like that. It’s pretty clear and able to read this pretty quickly. You’ll notice now I actually can now select text.
Before you move on, I recommend that you save your document at this point, uh, because later I find that this document will freeze up if you don’t save right after scanning and making the text recognizable.
So I’m going to do command S on my Mac to save the document. I’m going to save it to my desktop. And, let it keep the name of the original document.
Okay. The next thing I need to do is tag the document.
Well, there are none. So I’m going to go back to my toolbar and I’m going to find my Prepare for Accessibility tool. In this menu there is an Automatically Tag PDF.
So, since I have not started tagging in any way, shape or form, I am going to have it automatically tag the document for me. It shouldn’t take too long because this is a short document. As you can see, it has created tags and I’m going to save the document one more time before walking the tag tree.
So when I click on here, you’ll notice it highlights everything for me.
And now I can walk the tag tree using my arrows. I have a paragraph. Which is this – a block.
So we’re going to get rid of that here in a little bit.
We have an h1, a P tag, and then we go into another section where we have an H2 and an L tag with one, two, three, four bullets, but it’s actually five.
So we’re going to want to break up this tag.
And it looks like it did it as two…we just need to move it out. So, I can do that by simply finding the LI…the last one and moving it outside of that structure. So now, it should have this as a separate one.
This is a separate bullet. And this is a separate bullet.
So in this case I had to fix the bullets. And now I need to come up here to this empty P tag.
And I’m going to first archive or artifact this.
So we’re going to Change Tag to Artifact. We learned that in another video.
Once we’ve done this click on okay. We can now delete the P tag.
All right. So it looks like we’ve got our tagged document and it’s tagged properly and it’s got an H1 and H2 in the proper order.
And our bullets are all lined up. It looks like we have another one with two bullets. So let’s fix that really quickly. Here’s that second bullet and it’s embedded. So what we’re going to do is take it and drag it out.
So now. There we go. One. Oh. Two, three, four.
But it actually ended up further out.
So we’re going to drag this up to where it belongs.
Let’s try this. Two, three four, five and six.
Okay, now that we have our bullets in order, we are going to go look at our Reading Order.
And we’re going to start at the top. I’ll just kind of quickly scan. Perfect. It looks great. It’s going in the right order.
And so our reading order is okay.
Once I’ve done my accessibility tags and I’ve gone to look at my reading order, I can now come back to my floating menu bar and Check for Accessibility.
So I’m going to do a full accessibility check by clicking on this icon. Making sure I. All my options selected. Click. Start checking. And now you can see I only have two issues. The issues of the logical order and color contrast.
So I would manually want to check the color contrast, uh, and check the reading order, which we’ve already done. It’s interesting that it’s already passed the title. Uh, which means the metadata has been entered. I’m going to go ahead and check that because I don’t believe that it’s actually accurate.
So I’m going to go to file and I’m going to go to Document Properties.
And here, I’m going to go to description. And it does have a title The History of AI. Um I’m going to go ahead and give it. My name as the author. The subject is Artificial Intelligence. Keywords are Artificial Intelligence. AI and History. I’m going to click on okay. And now that I know this, it looks like we have an accessible document I can save.
And this document can now be read by a screen reader and other assistive technology. I hope that helps and we’ll see you in the next video.
Acrobat Fundamentals Demonstration
This is an introductory training on PDF Accessibility – Fundamentals. We’ll explore the basics of creating accessible PDFs, including how to review the tag structure and use built-in tools to check for accessibility issues.
Select here for transcript.
[Music]
Hello and welcome to PDF fundamentals, where we’re going to take a simple Word document and convert it to an accessible PDF.
Before we get started, you need to open Acrobat to make sure you’ve initialized it, and that you are logged in.
If not, you’ll need to log in or create an account, which we shared in another video. In this video, we’re going to show you how to convert a Word document into PDF and then remediate.
So the first thing I want to do…Once I know that my Acrobat application is initialized and I am logged in and I can tell that here, “Welcome to Acrobat Kevin,” which means I’m logged in. You can also tell here that I’m logged in. I’m going to open the Word file that I want to convert.
Now, in most cases, you want to make sure your Word file is as accessible as possible. You can see that this word file is indicating that there are some accessibility issues by this icon, right here and down here.
However, for the purposes of this video, we are going to ignore those issues so that we can remediate them inside of Acrobat.
To convert this file to Acrobat. We’re going to simply come up here to the different tabs and click on the Acrobat tab.
And over here on the far left, we’re going to go to the Create Adobe PDF and click Create PDF.
When we do that, it’s going to ask us where we want to store the file — I’m going to store it on my desktop — and what we want to name it. Because the extensions are different, you can name it with the same file name. I’m going to go ahead and save.
Once you do that, it’s going to start the conversion process, convert the document, and open it inside of Acrobat for you.
Now to make sure I don’t get confused, I’m going to come back here to Word and close Word so that I know what program I am in at all times, and I am going to maximize Acrobat. As we’ve shared in the Acrobat Tech Setup video, you want to make sure that you have your Accessibility Check tool here on this toolbar, the icon.
And, you want to make sure that you have the Tags and order icons here on the far right.
For now, so that I can have more screen real estate, I’m going to close the All Tools panel by clicking on Close All Tools.
Now the first thing that I like to do, once the document is converted, is to make sure that it has Tags.
So I’m going to open up the Tags panel by clicking on the Accessibility Tags icon here in this right menu. I can see that it has Tags. And when I click on a tag, you’ll notice that it highlights what that tag is referring to. In this case, I clicked on document, so it’s highlighting everything inside the document.
So now, what I’m going to do is use my up and down arrow keys to walk the tag tree.
And I can see already that I have this paragraph that is an empty paragraph space. A screen reader is going to read that as “Blank.” We’re going to remediate that here in just a little bit. I can see that there is my image. There’s an H1, there’s a paragraph, another paragraph, an H2 — oh, and here’s an H4. And as you know, we should never have headings out of order. So, after an H2 should either come another H2 or an H3, but not an H4.
So, we are going to have to fix that. And we’re going to do that here in just a little bit.
First I’m going to just continue quickly down the list. I see that we have another paragraph, and I’m just going to go and keep going. There’s a list. If I click my right arrow it’s going to expand that
And I’m going to just keep going down. That’s a list item, a list item, etc.
So there are five list items in that list. We have another H3, we have another list, H2, paragraph.
We’re now moving to the page two in the document,
And we have…I see here we have another H2 and an H2.
And actually this should be an h3, So we’ll need to remediate that here, soon. So we have a list another H3, H3, which should be a paragraph, that is not a heading.
And we have a list, an H3, a list, an H3, a list, H3, list.
And we have this empty H3. So when we have empty Tags like this we want to get rid of them.
But you can’t just hit the delete key– that causes problems in the background.
So what I’m going to do is I’m going to expand this, and when we do that you’re going to see that there is this blank tag here.
What we’re first going to do is archive that as an artifact.
So we’re going to right click on that and change tag to artifact.
This is going to appear to get rid of the blank tag. You’ll notice that it comes up with a dialog box.
And we’re just going to click on Okay for a Page Artifact type.
When we do that you’ll notice that that blank tag went away.
Now we can click the H3 that it was under and associated with and click the Delete key to get rid of that H3.
So we’re going to do that same thing with this paragraph tag that was at the top. We noticed that it was incorrect or it was a blank tag. So, we’re going to again, right click on it.
And we are going to change to Artifact and say Okay.
And then we can delete that paragraph.
We’re now going to go and fix a couple of things.
This h4 we’re going to actually fix later, but I’m going to show you how we would do it by fixing this, down here where there are two H2’s in a row.
This should actually be an H3, and we can actually easily fix that by clicking on this, and it’s going to let me click a second time inside. It’s not a double click — it’s a click, pause, click again. I’m going to now change this by simply deleting the two and making it an H3.
And it is now an H3 tag.
So I believe that was the only other error that we had. I am going to leave that H4 error. I could just quickly click on this and change it to H3.
However, I do want you to see the impact of this on the Accessibility Checker later in our tutorial.
Now that I’ve noticed that we do have Tags and they seem to be okay, and they seem to be flowing in the right order and tagged appropriately.
What we’re going to do now is look for Reading Order.
So this is how and what it’s going to be read in the screen reader and other assistive technology; but this reading over order here on the right is the order in which that content will be read.
And just like it highlighted in the Tags panel, when I click on something, it highlights it in the Reading Order panel as well.
So you can see here that one is the PDF fundamentals. As you can see, the image is not the first thing that’s being read. That is really common when converting from Word to Acrobat.
And we will fix that here in just a minute. There’s a lot of things on the screen. So again, just like we walk the tag tree, I can use my arrows and scroll down and see. The other thing that I like to do, if I see that overall, things look pretty good, is I can click these three dots and I can Display Like Elements in a Single Box.
So watch what happens to like this list right here, when I choose Display Like Items in a Single Box. You’ll notice that instead of five different elements, it is now a single element.
And now I can really quickly go down the tree to see if my Reading Order is correct.
And it does look correct. There’s a couple of things: one, the image is last and we want it to be first.
And you’ll notice that there’s this fourth called path. Paths are used for things like the path of the link specific to this hyperlink right here. So it is okay, and we’re going to leave it here for now, for this level of remediation.
For the image we want it at the top, so we can literally just click and drag it up to the top until you see the line under the page.
And when we click, you’ll now notice that it is the first thing that is being read.
Let’s go check out page two. So on page two, it looks pretty good. In this situation, the path refers to the line that is underneath. You’ll notice that it picked that line up on this page, but it did not pick it up on the page before.
We can ignore that because there’s nothing there to read.
And we’re going to continue down the tree — just make sure things are going to read in the correct order. It’s really important to check that this is going to flow correctly.
This is very important for documents with multiple columns, because often it will read text out of order and confuse the user as to what is going on because it will not flow correctly.
Once we have done the Tags and the Reading Order, now I’m ready to conduct my accessibility check.
So, at this point, I’m going to come over here and click the Accessibility Full Check button. I’m going to make sure that all of the checks that I want it to check for are identified by having the check in the box.
And so, I am now going to start checking.
This brings up the accessibility report here in this pane now to the right. And you can see that it is called Accessibility Checker.
In the document we have three issues: we have an alternative text issue, and we have a headings issue.
Let’s just really quickly start with that headings issue. You’ll notice that that heading failed, and that’s because it did not go in order that we know that this was an H2 and then this was labeled an H4. There’s a couple things we can do: we can learn, but right click on the element and learn, like, tell it to explain. Or we can go over and fix it and then check again.
So if I come back to my Tags, I go find that H4. You’ll see that it’s highlighted. And I click inside of it again, and click again, and change that to an H3. I can now go back to my accessibility check pane, right click, and check again. And you will see that this has now passed the test, and we can move on.
Let’s go up to the three document issues now. There are two issues that are always going to flag as needing attention in the Acrobat Accessibility checker.
And that is Logical Reading Order and Color Contrast. In Acrobat, it does not have a color contrast checker, and it does not know the Reading Order.
So what it’s telling us here is you need to manually go through your document and check to make sure the Reading Order is correct. We have already done that, and you need to use the color contrast checker to check for any contrast in the document. I’ve already checked the contrast with this image and text color and this image or this text color on the white background. Both have passed the color contrast guidelines. The third error that we have here in this document is the title.
So in order for an Acrobat file to be accessible, you must fill in the metadata for the file.
So if we click on this and now right click. You’ll notice that one of the options under this is to Fix.
So if I choose Fix Now you can see that I have some options.
And I’m going to uncheck and give it a title.
And this is “creating accessible PDF documents.” The subject is “accessibility” for now.
And the author is fine — we’re going to leave that as me.
And keywords I’m going to say are “accessibility”and “PDF.”
And click on okay. What this does, is it puts metadata in the file.
So when a person that’s using assistive technology is looking through their files, it is reading this information so they can know whether or not that is the file they’re actually looking for.
So this metadata is really important and a requirement to meet accessibility standards.
When we click on Okay, you’ll notice that in this case, it automatically passes.
And we do not need to recheck. So, we have all of these issues resolved because we’ve done the two manual checks.
And we have one more issue to address.
If I click the down arrow you’ll see that it shows that I have figures with alternative text that failed. I can see which specific figures by clicking the down arrow again and clicking on the figure. In this case, it’s figure one, which is on that first page, that banner, and it highlights that when I click on the figure name. To fix this, I’m going to right click and click Fix, and a dialog box pops up. This allows me to enter alternative text or mark the image as decorative.
If you mark the image as decorative, there is additional work to do, and we’re not going to cover that in this tutorial.
So for now, we’re going to simply give it some alternative text. I’m going to say that this is “creating accessible PDF documents banner with Acrobat and Seattle College’s logos.”
When you’re done, click Save and Close. And you will notice that it now has passed.
And we have an accessible document!
We have fixed all of our issues, including our two manual checks.
So, this document is ready for prime time. I hope this tutorial was helpful, and we’ll see you in future accessibility trainings. Ciao.
Accessibility, Title II, and WA User-01
Co-Presented with Julia Anderson
A presentation for SBCTC HCM Benefits, HR, and Payroll colleagues [HCM = Human Capital Management] from across WA who meet each quarter in-person and virtually each month.
Diversity, Equity, & Inclusion (DEI)
Featured
Inclusion Advocate Training
Oregon State University
November 5-6, 2018
This program provides training on how to be an Inclusion Advocate; help screening committees reduce implicit bias in the hiring process, with the goal of making our hiring an equitable, welcoming process for all.
At the end of this training, you will be able to…
- Describe the role of a search advocate in your own words;
- Give search committees an overview of cognitive and structural biases, including how such biases may affect search and selection;
- Suggest position description changes to promote diversity/inclusion and reduce bias;
- Facilitate committee development of a screening rubric that reduces structural and cognitive bias and increases inclusion;
- Help identify practices that may limit inclusion at each search stage and propose alternatives.
Open Educational Resources (OER)
The purpose of this course is to provide information and experience in using open educational resources (OER) in your teaching practice. We will discuss the concept of OER and open licenses. We will also provide plenty of practice in locating and sharing open educational resources. This is a 2-week online, asynchronous course and participants are expected to spend 10 hours to complete the course. This is a fully facilitated training that will produce an official certificate to the participants upon successful completion.
Course Objectives
Upon completion of this course, participants will be able to
- Describe the meaning of open educational resources.
- Differentiate the concepts of open licensing, public domain, and all rights reserved copyrights.
- Identify resources that are openly licensed or in public domain.
- Distinguish the different types of Creative Commons licenses.
- License their works under a Creative Commons license.
- Find the open educational resources, and properly attribute a work offered under a Creative Commons license.
Understanding Ally Scores in Canvas
Development Day – Winter 2025
Co-Presented with Julia Anderson, Accessible Technology Manager
Overview
This webinar, hosted by the eLearning and Accessibility Team, will guide faculty through the fundamentals of Ally in Canvas. Whether you’re new to Ally or looking for ways to boost your score, this session will empower you to create more accessible, engaging content for all students. You’ll learn how to:
- Interpret your Ally score in Canvas and what it means for accessibility.
- Address common accessibility issues to improve your score to 85% or higher.
- Use Ally and Canvas tools to create more inclusive course materials for all students.
Presentation Slide Deck
Continue ReadingBadges Earned
Executive Leadership
Accessibility
Artificial Intelligence (AI)
Canvas
Open Education
Quality Course Design
Welcome
Featured
Thanks for visiting my interactive online Vitaè. As a leader, I am driven by individual, team, and community successes derived from collaborative, anti-racist, equitable, inclusive, and accessible leadership practices.
You can use the buttons below to access information about me based on what is most relative to you.

Executive Director of eLearning
Featured
Seattle Central College
March 1, 2021 to Present

The Executive Director, eLearning is responsible for working with faculty, staff, and instructional administrators to ensure operational effectiveness in distance learning service and support for faculty and students. The eLearning department is charged with promoting and facilitating a consistent, accessible, and comprehensive eLearning program while working with instructional staff to expand access and continued quality improvement of distance learning courses and programs at the Seattle Colleges. The Executive Director will function to increase instructor capacity and interconnectivity across areas of eLearning, instructional design, and professional development with the goal of increasing access and successful outcomes for eLearning students at Seattle Colleges. This position serves as the administrative head of the Seattle Colleges Online department serving the Seattle Colleges.
Continue ReadingSkills
Featured
Equity, Diversity, Inclusion, & Accessibility
- Founder and President of a community center for members of the queer community, a diverse and marginalized community in the Midwest. Led a group of volunteers through the incorporation, strategic planning, and program development processes. Developed partnerships with local social service organizations, nonprofit groups, and business to build a community of respect and understanding centered around diversity initiatives. (The UP Center of Champaign County).
- Served on the City of Urbana’s Human Relations Commission. The commission advises and consults with the Mayor and Council on all matters involving racial, religious or ethnic prejudice or discrimination and recommends legislative action necessary to accomplish its purpose.
- Reviewed faculty curriculum and supported revisions specific to antiracists and inclusive teaching practices. (Seattle Colleges, Seattle Central)
- Served as an Inclusion Advocate on over 30 hiring committees for executive, faculty, classified, and exempt positions, ensuring a fair and equitable process. (Seattle Colleges, Seattle Central)
- Developed accessible Office documents and Web pages using Headings, Cascading Style Sheets, and other accessible design best practices. (Washington State Board of Community & Technical Colleges, Seattle Central, Seattle Colleges, University of Illinois)
Type of Work
Living Our Mission: Aligning Our Organization’s Strategic Plan to the Work
Bowersox-Johnson, K. (2021). Living our mission: Aligning our organization’s strategic plan to the work. Leadership Abstracts, 34(10). https://www.league.org/leadership-abstracts/living-our-mission-aligning-our-organization%E2%80%99s-strategic-plan-work
In December 2019, Seattle Colleges’ colleagues Victor Kuo and Daihong Chen (2019) introduced the institution’s strategic plan scorecard to “measure what matters.” To ensure that goals are achievable, faculty and staff must have ownership in developing their own plan of action that aligns their department’s work to the larger institutional goals.
A lot of time, energy, and dedication go into developing an academic institution’s strategic plan. However, it is hard for some staff within the institution to translate those plans into actions as the goals may feel too far removed from their daily grind. For example, without proper coaching and direction, technical support staff members who only work with faculty may not fully understand how their work directly impacts a goal specific to student retention. Therefore, the next step in the strategic plan process is involving departments in a strategic planning process of their own.
Online Learning for Dummies
Manning, S. & Johnson, K (2020). Online education for dummies. Indianapolis: Wiley Publishing, Inc.
 Whether you’re a college student, adult learner, or professional in continuing education, some—and sometimes all—of your learning will happen in a virtual classroom. This book is your friendly guide to the fast-growing possibilities of this world, from choosing the right course and mastering the software to polishing up your online communication and study skills. Whatever you want from your study experience—school success, professional development, or just pursuing your passion—this is your road map to online educational success!
- Identify the best online program for you
- Get organized to succeed at learning at a distance
- Be the best learner you can be
Applications in the Wild: LXD Practicum
Oregon State University
July 29 – September 8, 2019
It’s all about making connections. This culminating capstone experience will allow participants to apply what they have learned throughout the program, to a meaningful project that addresses authentic needs within their workplace or place of internship. Learners will have an opportunity to showcase competencies that are universally desired by LXD-UXD employers. The evidences created through this practicum will undoubtedly contribute to an impressive portfolio.
Live Streaming Practice 2
Second Practice of Live Streaming Using OBS and YouTube Live
July 15, 2019
Overview
In my second practice session, I decided to use an external camera, as I was unable to do that during the first attempt. After researching why, I was able to find the necessary tools to convert the external video camera’s signal to my computer so that it can be chosen as a source in OBS.
Watch A Recording of the Live Stream
Image of OBS Application

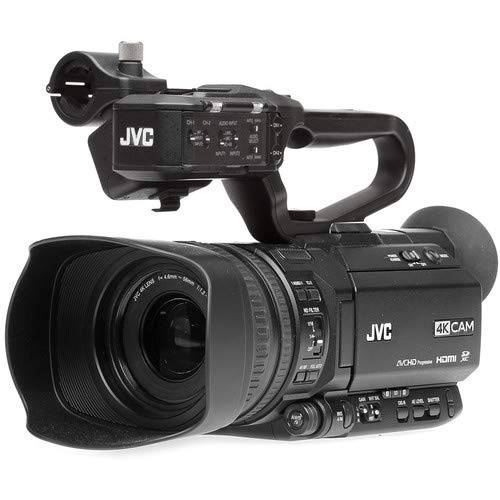
Image of Camera & Video Card
I used a Canon Vixia Video Camera and the Mirabox USB-C Video Capture Card to convert the video to my Mac so that OBS could use the video camera as a video image source to capture from. The image below illustrates how the camera and video card are connected.The tutorial video below covers the OBS setting needed when using an external camera and the Mirabox Capture Card.
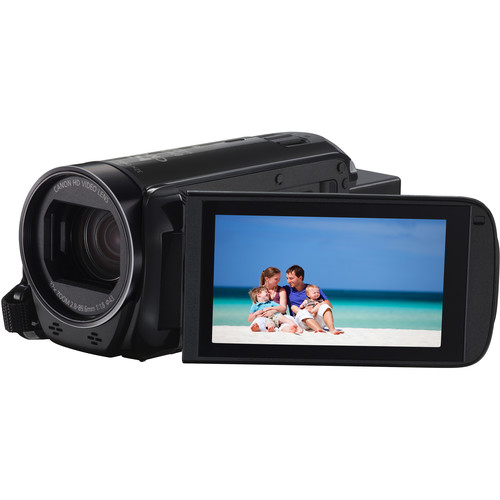

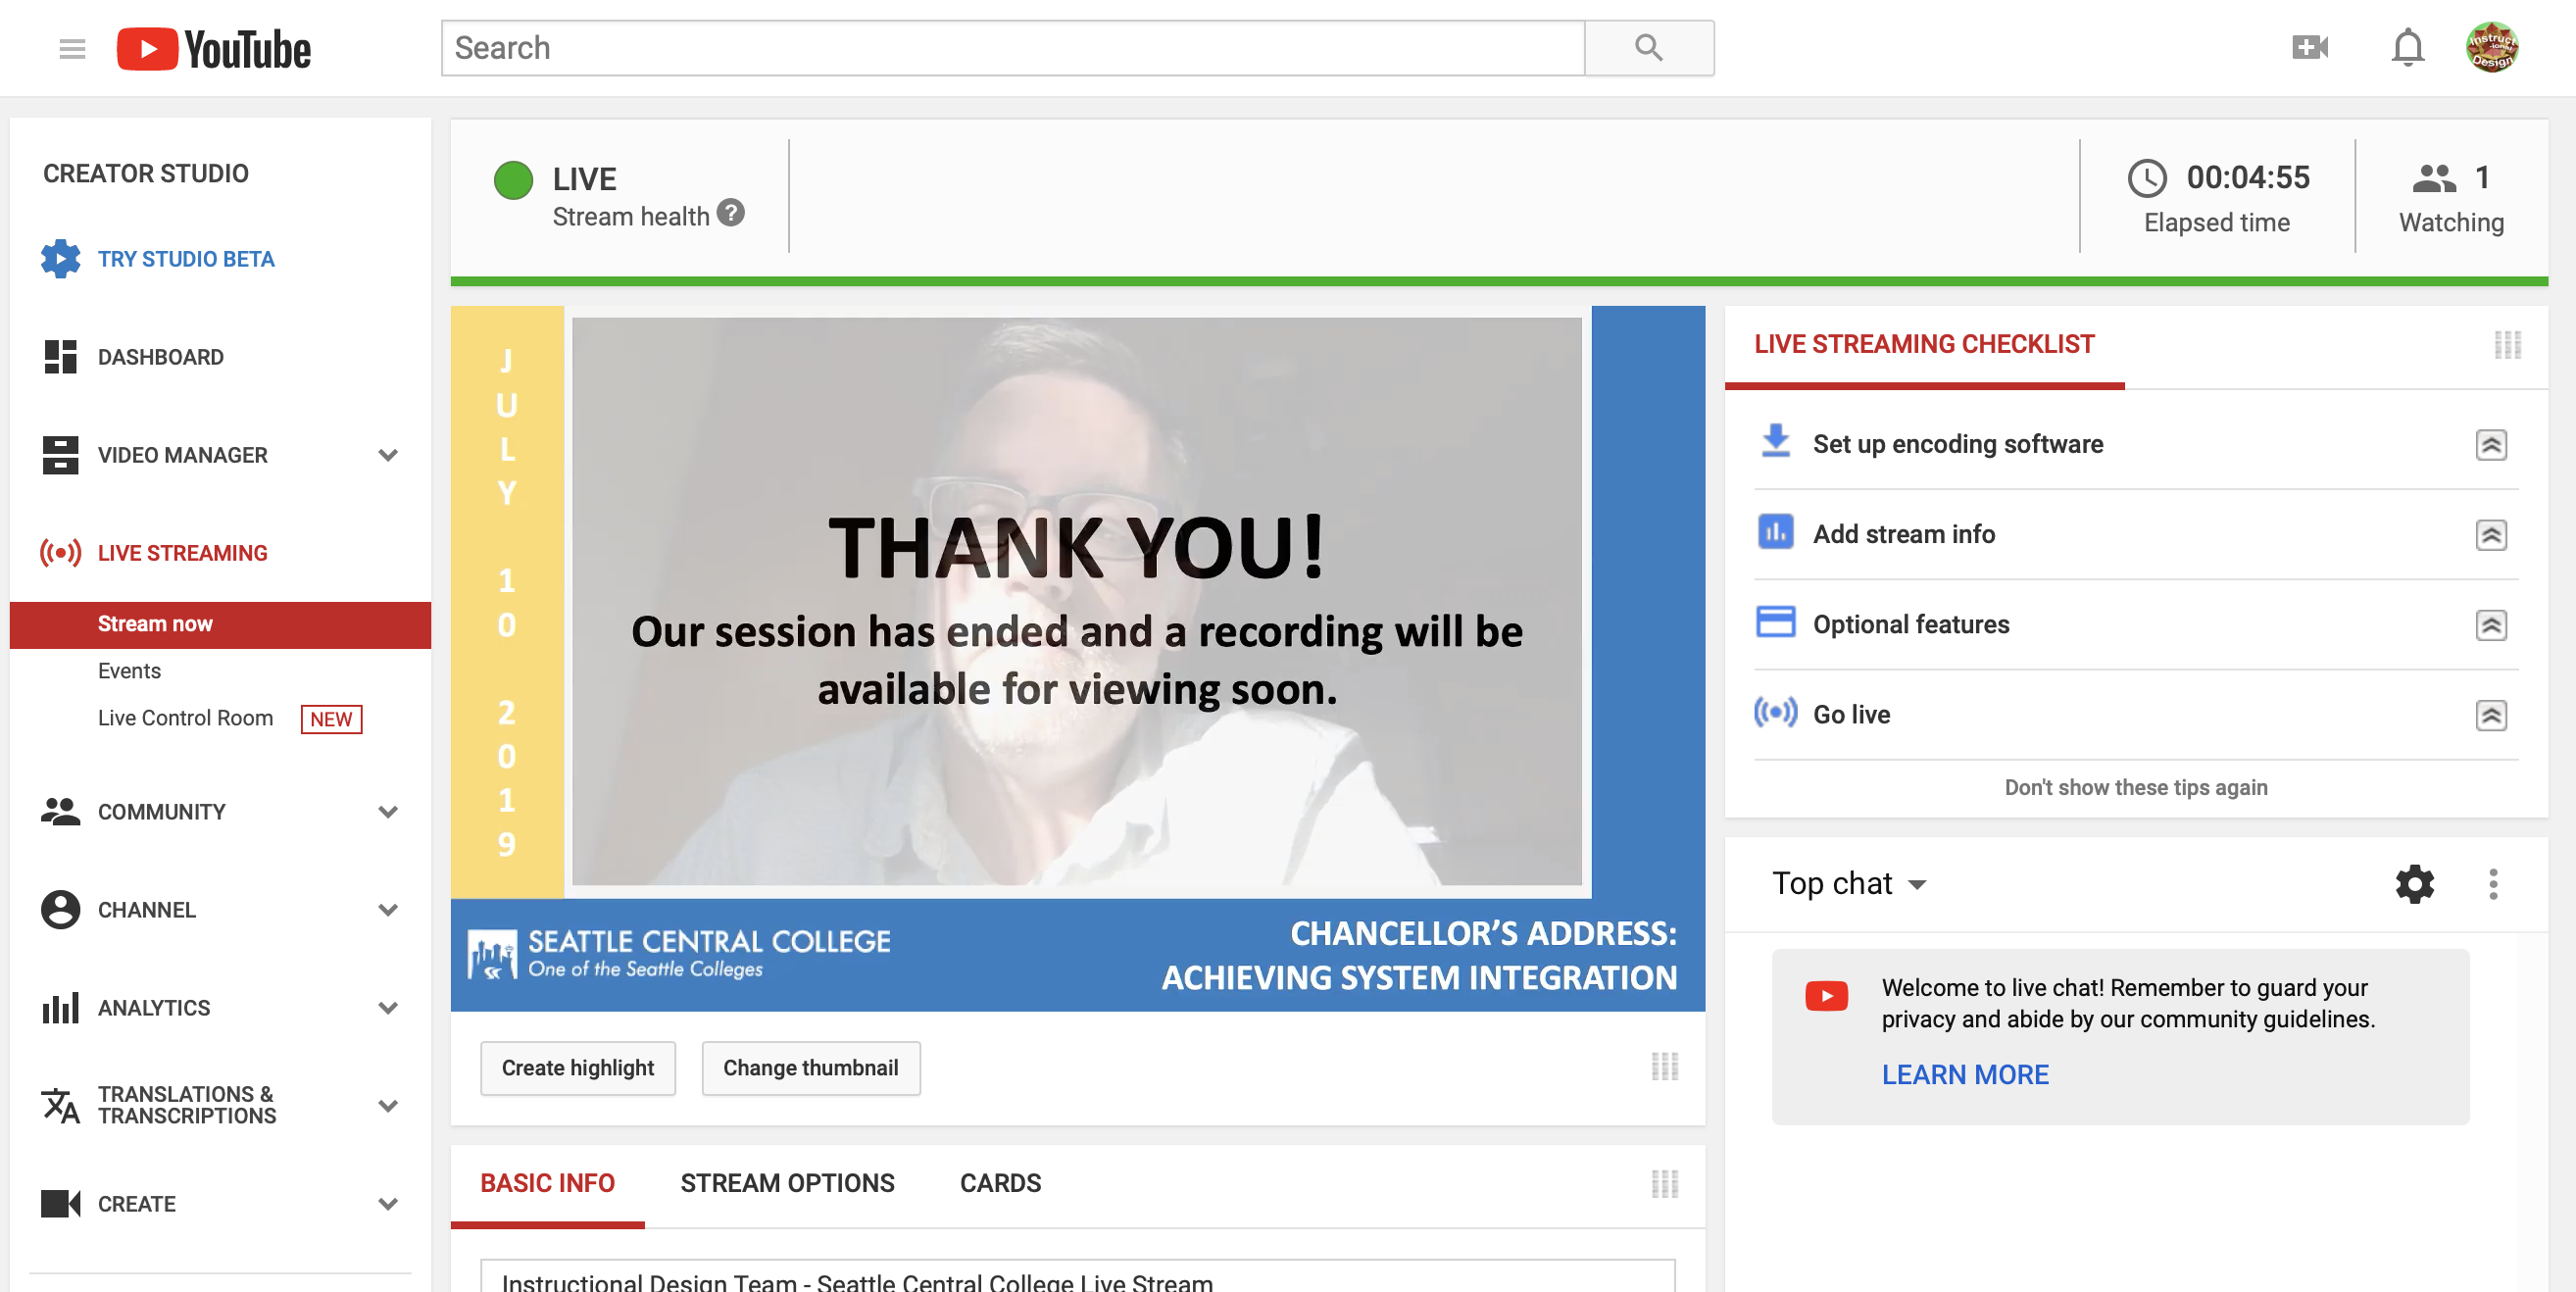
Image of Live Stream Via YouTube
Reflection
In this attempt, I was able to connect an external video camera to my computer using the Mirabox Video Capture Card. This allows for more flexibility in when and where we can stream live events – not relying only on the built-in webcam. At first, the video wasn’t working. I had to conduct a lot of research to figure out the video settings inside of OBS to get it to recognize the video stream. After I got that working, I attempted my first recording. Unfortunately, when playing back the recording, I noticed the audio was not synched with the video – the sound was coming about 3 seconds before the video. I could have synched the audio in post-production editing, but wanted to fix it in the live version so the streaming video would be properly synched. After much additional research, I was able to adjust the settings in OBS so that the video rendered in synch with the audio. With the ability to use a external, High Definition camera and the audio and video in synch, I am now able to produce high quality streaming videos from any location with an Internet connection.
Engaging With A Live Audience
The next chapter of this adventure includes ideas for engaging with our live audience. Engagement is important so that audiences are left with only looking at a screen and listening to a lecture or talk. Engagement will depend on delivery method. For example, when using Facebook, you can see who is logged in and watching your live feed, which allows you to callout people by name as a simple way of engaging them. Other ways to engage include:
Polling: Some streaming services allow for polling audiences. Polls can be determined and setup ahead of time so that audiences can provide immediate feedback to the speaker.
Comments/Chat: Audiences can provide comments and chat during lives sessions. This allows the speaker to ask question and audience members to respond via comments or chat. It also allows the audience members to ask questions that the speaker can respond to in the live environment.
Links & Resources: The speaker can share out links and resources for audience members to access during or after the session. These could also be provided in promotional materials so that audience members can access them before the session and then bring their questions to the session or submit them ahead of time through a survey tool of sorts.
Hidden Gems / Easter Eggs: In gaming, Easter Eggs are hidden bonuses that players may or may not know to look for. In a live streaming event, we could have information that is only provided during the session that leads to some “fun” bonus prize like a free drink or chocolate.
Demonstration: By providing a demonstration during the live stream, you can encourage audience members to follow along and try themselves. If supplies are needed, a list of materials can be provided in the promotional materials.
Follow-up: Live events can serve as a springboard to work that needs to happen after the event. For example, you might interview a specialist in the field that couldn’t make it to the classroom and then have students follow up with an activity or reflection.
Resources
- Open Broadcast Software (OBS)
- Microsoft PowerPoint
- YouTube Live Dashboard
- Music for Intro and Outro: Bensoud
- Mirabox USB-C Video Capture Card
- Training Video (Watch Below)
Challenges
Connecting an External Camera – Need a video mixer to do this. I was able to identify the problem and equipment I need to order for the future.– FixedOur WiFi and Firewall at our Institution was blocking the port needed for live streaming to YouTube.– Fixed- The design of the slides to match the video and text sizes took several attempts.
- CSS for YouTube’s chat window in order to include it in my live stream.
Live Steaming Practice
Practices of Live Streaming Using OBS and YouTube Live
July 11, 2019
Overview
For this project, I decided to test Live Streaming of video. As a district, our college often offers the same information session at multiple colleges. By streaming video, we can save travel and time by hosting viewing parties with moderators at each of the colleges.
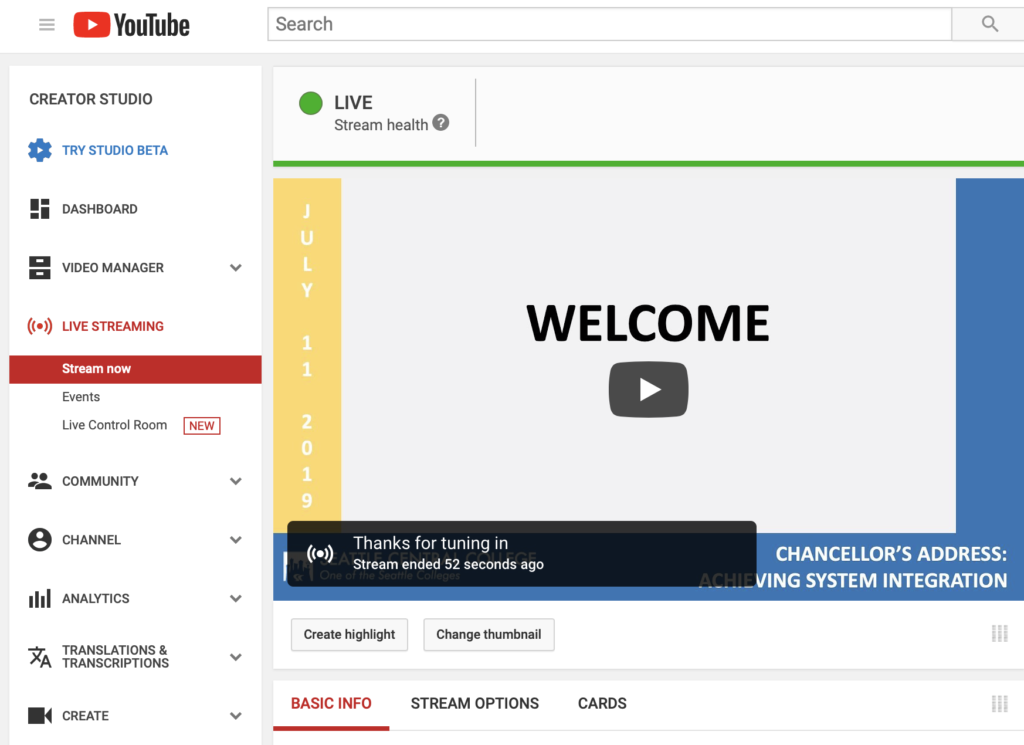
Watch A Recording of the Live Stream
Image of Live Stream Via YouTube
Resources
- Open Broadcast Software (OBS)
- Microsoft PowerPoint
- YouTube Live Dashboard
- Music for Intro and Outro: Bensoud
- Training Video (Watch Below)
Challenges
- Connecting an External Camera – Need a video mixer to do this. I was able to identify the problem and equipment I need to order for the future.
- Our WiFi and Firewall at our Institution was blocking the port needed for live streaming to YouTube.
- The design of the slides to match the video and text sizes took several attempts.
- CSS for YouTube’s chat window in order to include it in my live stream.
Live Streaming
Oregon State University – LXD: Advanced Tools & E-Learning Trends
June 3 – July 21, 2019
Overview
Our college is a part of a district, and we hold several meetings covering the same topic often. The purpose of this project is to test live streaming as an option to conduct these meetings in order to reduce the number of face-to-face meetings and traveling required to offer several face-to-face meetings at different locations. A potential added benefit is for our Instructional Design and Instructional Technology teams to collaborate on the development of a course that would teach faculty how to use this technology in the classroom.
Audience
Seattle College’s Instructional Designers & Instructional Technologists
Space & Equipment
We were fortunate enough to be able to acquire space within our facility and turn it into a video/audio recording studio. It comes with two side post-production rooms where we can record or edit as well – pictured below. 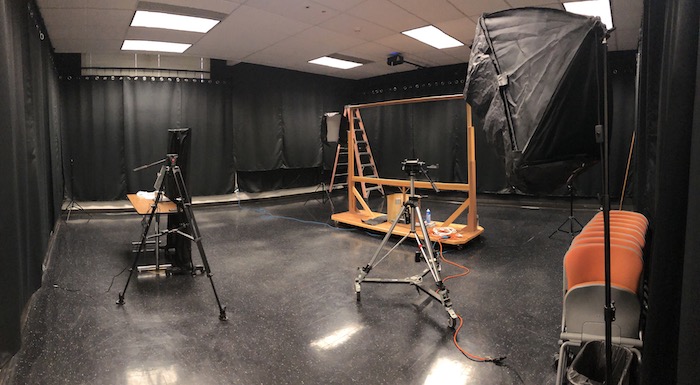
The recording studio is great for streaming basic announcements and other content where a live audience isn’t present. However, live streaming events will require us to have equipment that can travel to different locations. So, we purchased the following equipment
- two cameras (pictured below) from Amazon
- Portable LED Lighting (included w/Cameras)
- Tripods on Wheels (2)
- Wireless Lapel Microphones (2).
Server & Software
Based on initial research, and the watching of How To Live Stream On YouTube With OBS | Fast Start Guide, I’ll be using the Google Live Streaming server in collaboration with Open Broadcast Software (OBS) on a Mac.
Practice Podcast: Plagiarism
Solving Instructional Problems, with Justin Time
June 19

Overview
In this episode, Kevin Bowersox-Johnson, Director of eLearning at Seattle Central College steps in for Justin Time. Kevin explores the topic of Plagiarism with faculty member, Yun Moh, and Instructional Designer, Robin Leeson. Listen in as they discuss the problem and share pedagogical strategies for reducing Plagiarism and tools for supporting the effort.
Listen Now
Resources
- Video Tutorial: Introduction to Canvas Gradebook for Instructors
- New Canvas Gradebook
- Canvas Guides: Grades
- Canvas Guides: New Gradebook
Our Guests
 Yun Moh, Instructional Designer
Yun has been supporting faculty members and academic departments at Seattle Central as an instructional designer since 2015. He has been sharing instructional design knowledge such as Quality Matters and Universal Design along with over 20 years of teaching and curriculum development experience in online and hybrid courses using innovative pedagogy and technology.
 Robin Leeson, Instructional Designer
Robin provides a variety of Instructional Design support and services including course design consultation, faculty training, and captioning. Robin also serves on the Accessibility and Guided Pathways committees. Robin has a Master’s degree in both Adult Learning and English/Creative Writing.
Our Team
 Kevin Bowersox-Johnson, Director
Kevin has over 25 years experience in Education and Instructional Technology & Distance Education. He has a Mater’s degree in Curriculum and Instruction and has taught in both K-12 and Higher Education environments. Kevin has supported several higher education institutions develop policies, procedures, and academic programs specific to distance education.
 Jesse Hernandez, Instructional Technologist / Producer
Jesse is a transplant from the Sunshine State who started as a student at Seattle Central. Jesse has served as a Student IT Consultant in our TLC before accepting the position of Instructional Technologist where he works closely with our Instructional Designers and Faculty. His primary role is teaching faculty how to use our college’s technology tools. Jesse also serves as our Podcast Producer.
Podcasts
Oregon State University – LXD: Advanced Tools & E-Learning Trends
June 3 – July 21, 2019
Overview
Many of our faculty have expressed interest in podcasting as a way of adding another, portable element to their course. Most of the interest surrounds the creation of content that students can access on the move when commuting to class from devices such as their phones. As the Director of eLearning, it is my role to lead the team who supports faculty in these endeavors and teach them pedagogically sound practices for doing so. Therefore, my team and I decided to create a podcast that focuses on innovative ways to solve instructional problems. As a part of this project, we hope to create a model podcast, handouts that guide faculty in how to do this both technically and pedagogically and provide a studio setting with equipment to do it in. Since this project started, we have also decided to create an Introduction to Podcasting Course for our faculty as well.
I imagine that objectives for that course might look something like the following:
After completion of this training, learners will be able to…
- Define podcast in their own words.
- Podcast vs. Vodcast
- Align a pedagogical rationale for using podcasts in their classroom to their learning objectives.
- Develop a podcast structure in alignment with their instructional objectives.
- Create a sample podcast with intro/outro music
- Identify tools and equipment needed for creating a podcast.
- Locate and download intro/outro music to the podcast.
- Use Audacity to record and edit the podcast.
- Choose a server to host their podcast.
- Share the RSS feed link to their podcasts with others.
Audience
Higher Education Faculty
Space & Equipment
We were fortunate enough to be able to acquire space within our facility and turn it into a video/audio recording studio. It comes with two side post-production rooms where we can record or edit as well – pictured below.
For podcasting, we have ordered the Rodecaster-Pro Bundle with four mics, cables, positionable stands, and headsets.

Production
Being the organizational freak that I am, I wanted to make sure we did this right. So, I called an initial production meeting last week. At our first meeting, we discussed the purpose, target audience, potential structure, and topics. Because I don’t want to start something we are not serious about, I said we wouldn’t go live with our first edition until we had recorded at least 12 of the first 24 episodes. We hope to record these over the summer and begin releasing in the Fall. Things we are to bring to our next meeting include potential names, topics, and ideas for intro/outro music, Logo, marketing, etc.
At our second production meeting we worked on Podcasts structure (segments), name, and example topics. We decided that we were going to let the topics more organically develop by asking faculty to share challenges and successes with us. The general structure will be as follows:
Draft Title
Solving Instructional Problems, with Justin Time
Structure
- 2 episodes per month, on the 1stand 3rdMondays.
- 1stMonday: Full episode, exploring an instructional problem, identifying both pedagogical and technical solutions with faculty. Visual companion that includes a video demonstrating the tool and resources for further reading.
- 3rdMonday: Condensed episode, exploring how to incorporate various topics into a class, with instructors doing that work. Center around current & upcoming issues, themes, and campus events.
Segments
- Introduction (3 minutes): Provide the audience with the vodcast/producer identification reinforcing the program recognition and the “fan” base.
- Podcast intro, music, hook and tagline
- Episode intro, with faculty member present and present the problem
- Ask faculty member to introduce themselves to the listener (what they teach, a little about themselves, and their learning environments)
- Define problem with SME (3-5 minutes): Lay out the problem elements for the listeners to connect with their own experience. Invite the listeners to identify themselves in the problem and start visualizing the situation.
- We presented the problem in the introduction
- We ask the SME to tell us more about the problem, including how they have experienced it within their own classes
- We ask the SME about the impact of the problem on students and faculty alike
- Questions for the SME:
- Can you tell us more about what this problem is?
- How have you experienced this in your classroom?
- How did you notice the problem was occurring?
- Why is this a problem?
- What is the impact of this problem, and who does it impact (students, instructors, or both)?
- SME Solution (8-10 minutes): Present the SME’s solution using the 5W1H approach demonstrating the problem-solving process, the rational, and the outcomes. The listeners have an opportunity to compare them with their own situations, and they may and may not fully associate with the SME’s solution.
- We ask the SME how they’ve solved the problem within their own classes, and let them take us through their process
- We ask if the solution worked or not, and what did they learn from it either way
- We ask the SME for any advice they might give to other faculty trying to implement the solution
- Questions for the SME:
- Please summarize for everyone the solution you implemented
- How did you identify the solution (for example, what resources did you refer to, did you consult with peers, etc.?)
- Why did you choose this particular solution to implement?
- Did this resolve the problem in your class, and how could you tell?
- What challenges did you face in implementing this solution?
- What advice do you have for anyone else wrestling with this problem?
- Any suggestions on putting your solution into practice for instructors from different disciplines, or who teach in different learning environments?
- Tool Presentation (7-10 minutes): Regroup and align the conversation to the tools and solutions that the podcast series plans to cover in 12 episodes. This segment may include tools not covered in the SME Solution section to provide more general solutions.
- We present a particular tool that we feel can help solve the problem
- We talk about why the tool was chosen and what it can do to help with the problem
- We talk about any challenges or considerations when using the tool
- If SME used the tool, we ask them for any suggestions they might have
- Visual companion should include a video demonstrating using the tool, created in conjunction with the SME, when possible
- Presenter to include:
- Which tool was chosen, and why
- What considerations should an instructor make when using this tool?
- What are the benefits of using the tool?
- What are the challenges of using the tool?
- What resources are available to instructors using the tool?
- Q&A (2-3 minutes): Provide listener participation to the current and the next episode. Connect the listeners and the SME.
-
- Solicit questions on the topic in advance (for the current or next episode?)
- Include SME for Q&A
-
- Acknowledgements & Closer (1 minute): Provide a hook to the next episode. Create a sense of community.
-
- Thank the SME for presenting
- Thank the listener for tuning in
- Preview the next episode
-
LXD: Advanced Tools & E-Learning Trends
Oregon State University
June 3 – July 21, 2019
Advanced Tools and E-Learning Trends presents additional varieties of online tools to include in your e-learning activities, in order to build a robust learning ecosystem. You will investigate tools that support online collaboration, videos, screencasts, podcasts, and live streaming, to promote deeper student engagement in your e-learning. You will also build your own framework for both evaluating and implementing tools within your e-learning activities. The methodology for this course is based on constructionism, where you create new learning by “tinkering” and creating learning artifacts with the tools, sharing them with your peers on a digital portfolio website, then discussing and reflecting on what you have learned.
Projects
LXD: Lifelong Learning Engagement Strategies
Oregon State University
April 15 – May 26, 2019
Effective Learning Experience Designers (LXDs) respect and capitalize on the knowledge that each participant brings to the table. They know how to assess learner needs, and then build modules to target those areas. They understand that when learners create and drive their own learning experiences they are more likely to engage in the process, internalize, and apply the concepts presented. Therefore, this course is aimed at preparing LXDs to serve as facilitators of knowledge creation by equipping them with a toolkit of pedagogical and andragogical principles and practices that will invite learners to “play, pull, create, & explore” to satisfy individual’s learning needs.
UX/UI for Experience Design
Oregon State University
February 25 – April 7, 2019
Gain the foundational understanding of human computer interaction and user experience design through applying design thinking methods and learning the skills involved in designing interactive systems for diverse audiences and purposes. You will be introduced to different types of prototyping methods as well as cognition and perception play a critical role in affecting the experience of interaction design. We will carry out the design process to design experiences for all users by using appropriate standards of accessibility and implement a user-centric approach that maximize the overall user experience. The course will include lectures, reading, discussions, and practical experience working through a design problem of your choice.
LXD: Elements of Learning Experience Design
Oregon State University
January 7- February 17, 2019
It’s all about making connections. This culminating capstone experience will allow participants to apply what they have learned throughout the program, to a meaningful project that addresses authentic needs within their workplace or place of internship. Learners will have an opportunity to showcase competencies that are universally desired by LXD-UXD employers. The evidences created through this practicum will undoubtedly contribute to an impressive portfolio.
Learning Experience Design (LXD) Certificate
Oregon State University – Ft. Lauderdale, FL
January 2019 to Present
Certificate
Program Overview
aThe online education space is thriving and reaching more students every year. E-learning provides an excellent opportunity for working parents taking classes in the evenings, international students looking for diverse education, or anyone who wants to navigate materials on their schedule and collaborate in an online environment. As educators creating these materials, we have an opportunity to create high-quality online learning experiences centered on the learner and utilizing the latest e-learning technologies.
Off the Beaten Path: A Pathway Model for Faculty & Staff
Co-Presented with Lynn Kanne
May 2019
Seattle Central’s EDGE (Education + Design = Excellence) program applies the pathways concept to faculty development. Program participants can earn a stipend after participating in 29 hours of instruction focusing on technology tools, pedagogy, and accessibility. In its first two quarters, 109 individuals participated in over 1,000 hours of training in this program.
We will share our strategies and templates for organizing, marketing, and implementing this program. We’ll show how we addressed registering, tracking, and credentialing with tools and resources we already had: Canvas, Google, Badgr, Outlook, Illustrator and state-wide trainings and we’ll explore other development areas that might benefit from this pathways approach. Participants are invited to bring their own strategies and questions focused on programming for faculty and staff development.
Engaging Students Through Course Design
Washington Annual Canvas Conference (WACC)
March 2019
Come learn how to create dynamic and esthetically pleasing Canvas pages to help students more effectively and efficiently navigate your course.
At the end of this sessions, participants will be able to
- access Canvas Style Guide
- create buttons to more effectively navigate within a page
- develop page elements to help visually chunk and sequence course content.
Director of eLearning
Seattle Central College
July 11, 2016 to March 1, 2021
The Director of Distance & eLearning is responsible for directing and managing the self-supporting Distance Education program that serves over 1,000 students annually. It also supports online and hybrid programs serving 15% of FTE. The primary goal of the new Director is to increase distance education enrollments while continuing to support the growth of online, hybrid and web enhanced offerings.
Director of Distance Education
“Kevin has done a remarkable job at facilitating vision and direction at the individual, department, and campus levels all while balancing professionalism and decorum among faculty and staff.”
Marissa Stewart
As a supervisor and a leader, Kevin has a good balance of supporting and challenging his staff. He gives consistent positive and constructive feedback, fostering continuous coaching and development. He sets challenging expectations for his staff and holds them accountable to a high standard of professionalism, communication, and performance. His positivity and enthusiasm as a leader help to create and encourage a culture of appreciation that I am confident he would bring to teaching.
Online Student
“Kevin was always responsive, upbeat, encouraging, He is very knowledgeable in the field. Our course was well-staged, no fluff, all pertinent interesting material.” and were always up to date.”
Online Student
“Kevin provided clear concise expectations for assignments and went out of his way to make sure we understood what was expected of us.”
Online Student
Kevin is very knowledgeable of subject matter and quite experienced in teaching both online and face-to-face, and yet is very approachable, down to earth, and eager to help his students and transfer his knowledge.”
Cindy Guthrie, M.S.
“ Working with Kevin is always exciting and rewarding. He has excellent solutions, can articulate his ideas and interpret your response, and when he becomes committed to a cause is passionate beyond words.”
Dr. Terry Fencl
“As a teaching colleague, I was able to witness and experience Kevin’s joy in teaching learners with technology, his commitment to his students, his creativity in course curriculum, his collaborative skills in collegial teaching, his diligence in evaluating learning outcomes, and his ability to communicate with and motivate learners.”
Dr. Susan Manning
”When it comes to seeking innovation and new ways of thinking, Kevin sets the bar very high. He is a tinkerer. Not only does he bring a specific technical background, but he has fun seeking new solutions to old problems.”
Administration / Supervision / Coaching
- Provided leadership in a manner that advances the company’s mission and promotes quality products and services to clients.
- Overseen the strategic planning, marketing, budgeting, contracting, and implementing of all projects and initiatives within multiple organizations.
- Led a team of consultants during client projects and responsible for analyzing, designing, developing, implementing and evaluating solutions for meeting clients’ needs.
- Developed, implemented, and supervised an instructors’ peer coaching program.
- Identified, hired, trained, and supervised Faculty Mentors.
- Developed and supervised a Faculty Development Program that provided over 2,000 hours of training to 118 unique participants in its first year of implementation.
- Developed processes and procedures for providing technical and pedagogical support to online instructors; Provided technical/pedagogical support to Global Campus instructors.
- Created and facilitated bi-weekly and annual 2-day SUPERvisor training. Topics include hiring practices, strategies for performance monitoring/review, and developing obtainable, measurable, and observable goals, etc.
-
Coached SUPERvisors through difficult situations regarding employee relations including performance issues and termination of employment.
Quality Instruction
Featured
- Led collaborative statewide initiative to develop quality standards for designing online courses. Used standards to evaluate over 200 online courses, providing specific feedback to instructors and course designers on strategies for improving course design to improve learning.
- Co-authored The Technology Toolbelt for Teaching, a book that helps faculty solve instructional problems using technology tools. The book introduces a decision-making matrix to ensure the tools teachers choose align with their instructional goals.
- Identified, hired, trained, and supervised face-to-face and online faculty and faculty mentors. Developed and implemented instructor mentor and evaluation processes. Developed, implemented, and supervised an instructors’ peer coaching program.
- Developed, updated, and taught online, graduate-level courses to community college and university faculty in areas of Online Pedagogy, Instructional Design, Web Design, Synchronous Communication, Technology Tools, Issues and Strategies for Faculty Support and Development, & Quality.
- Served as network administrator and taught using multiple course management systems and synchronous communication tools including Blackboard, Desire2Learn, Moodle, Adobe Connect Pro, Blackboard Collaborate, WebEx, Live Meeting, Skype, and Bomgar.
Student Success
Featured
- Developed department and processes for providing technical and pedagogical support to students and faculty at a distance. Developed new student orientation program for students transitioning to the online learning environment.
- Consulted with multiple academic institutions and businesses to develop online, blended, and face-to-face education programs.
- Co-authored Online Education for Dummies, a book that helps perspective students learn about online education, what to expect as a student, and strategies for successful transition to the virtual classroom.
Web Site Management
Parkland Community College
2002 to 2003
Develop a web site with management of the site and of site growth as design goals. Incorporate mechanisms managing changes in web site, feedback from site users, and know how to make a site secure for e-commerce.
Computer Technology I
Heald Business and Technical College
1997 to 2001
Introduction to personal computer hardware, operating systems, graphical user interfaces, and software applications including word processing, database, and spreadsheet. Topics include DOS operations, floppy disk and file management, basic windows operations, data management, and configuration and use of software applications. This course covers how to connect, communicate, find and retrieve information on the Internet.
Internet Studies
Heald Business and Technical College
1997 to 2001
Students are introduced to the infrastructure and current uses of the Internet, including concepts such as web page design, creation, and management, electronic commerce, and web-based programming.
Spreadsheet Applications
Heald Business and Technical College
1997 to 2001
Provides coverage of the operations and features of spreadsheet software. Students analyze and apply spreadsheet solutions to business problems in the areas of finance, information tracking, reporting, and presentation. Real-world business situations are explored through the use of creative thinking and problem-solving techniques.
Graphics and Presentations
Heald Business and Technical College
1997 to 2001
Using current desktop publishing software and electronic presentation tools, students develop skills to create effective multimedia presentations and desktop publications. Applications include using fonts, styles, layouts, graphics, online resources, and video and sound clips. Audience analysis, planning, and citation are addressed, as well as the preparation and practice of oral presentations.
Business Internship
Heald Business and Technical College
1997 to 2001
The internship program is an opportunity for students to gain the experience necessary to compete in today’s job market. It is designed to provide students with real-life work experiences in on-the-job training situations relevant to their major fields of study. Internships provide students the opportunities to put theory into practice, applying the knowledge and skills they have learned at Heald to actual work situations. Taken in the final quarter of the degree program.
Database Management
Heald Business and Technical College
1997 to 2001
The course is an introduction to the use of a database management program, including database structure, accessing, editing, and searching files, and designing and producing reports and labels.
PC Troubleshooting/Configuration
Heald Business and Technical College
1997 to 2001
This course introduces students to the elements of PC troubleshooting and configuration. Students study hardware and software installation and configuration, as well as troubleshoot computer hardware and software failures, adding peripherals, resolving compatibility issues, and maintaining effective customer relations.
Word Processing
Heald Business and Technical College
1997 to 2001
Application of word processing features and concepts. This class emphasizes efficient use of the features and concepts of word processing. Projects related to the student’s career area focus on standard forms, formatting, and the development of written communication skills.
International Business
Heald Business and Technical College
1997 to 2001
The varied dimensions of doing business in an international context are examined, emphasizing patterns of international trade, social and political frameworks, the economic environment, and national and international constraints. Other topics addressed are general management issues associated with planning, finance, marketing, staffing, legal requirements, and the impact of e-business on the global economy.